Deploying a Spring Boot Application with PostgreSQL on AWS Using Docker(ECR), Kubernetes (EKS): A Step-by-Step Guide


Table of contents
- Intro:
- Prerequisites:
- Steps to achieve this:
- Context: I have a spring boot application named DeployingDockerImageToAws ready and the name of my project jar file is deployjobapp.jar.I will be using this project as a reference for deployment.
- Step1:
- Step2:
- Step3:
- Step4:
- Step5:
- Step6:
- Step7:
- Step8:
- Congratulations. You just deployed your spring boot application to the AWS cloud using ECR and EKS.
- Step9:
- Note: For Reference
- Links to download, install, and configure tools:
- For reading more such articles, please subscribe to my hash node account.
Intro:
Imagine you've created an awesome app with Spring Boot and a database, and now you're eager for the whole world to experience it. To achieve this, you must launch your app online in a way that it can effortlessly manage numerous users, maintain seamless operation, and allow for hassle-free updates. This is where the magic of Docker and Kubernetes comes into play. However, we won't be using Docker and Kubernetes directly. Instead, we'll leverage the power of Amazon Web Services (AWS) and its specialized services for Docker and Kubernetes, namely ECR and EKS.
Think of Docker as a magical box that ensures your app functions consistently everywhere, whether it's running on your laptop or a powerful server in the cloud. AWS acts as a vast array of computers and services on the internet, ready to host your app. ECR (Elastic Container Registry), which is built on Docker, serves as a repository on AWS where you can store these magical Docker boxes or Docker images. EKS (Elastic Kubernetes Service), built on Kubernetes, works like a smart helper, automatically organizing and growing your app with ease.
In simple terms, we'll encapsulate your Spring Boot app within a Docker container, deposit this container in ECR, and then utilize EKS to ensure it performs flawlessly on AWS. This approach ensures that your app can support a large user base, operate continuously, and be updated smoothly whenever improvements are made. Are you ready to embark on this journey? Let's get started!
Prerequisites:
Download and Install Docker
First, ensure Docker Desktop is installed on your machine and keep it running throughout the setup process. Docker allows you to create, deploy, and run applications in containers, making it easier to manage dependencies and ensure consistency across development, testing, and production environments.
Sign Up for an AWS Account
You can register for an AWS free tier account, which allows access to many services at no cost. Keep in mind, however, that certain AWS services, like ECR (Elastic Container Registry) and EKS (Elastic Kubernetes Service), may incur charges. I will provide updates with all necessary details regarding costs as soon as they are available. AWS provides a broad set of cloud-based services, enabling you to build, deploy, and scale applications.
Install kubectl and configure it in your system
Next, download
kubectland incorporate it into your system's PATH by adjusting the Environment Variables in the System Settings. This step ensures that you can run Kubernetes commands from anywhere on your machine.kubectlis a command-line tool that allows you to run commands against Kubernetes clusters, enabling you to deploy applications, inspect and manage cluster resources, and view logs.Install eksctl and configure it
For Windows users interested in downloading
eksctl, you'll need to install Chocolatey first. Once Chocolatey is installed, configure it by adding its bin folder to your system's PATH in the Environment Variables. This preparation allows for the smooth installation ofeksctl.eksctlis a simple CLI tool for creating clusters on EKS, making it easier to create and manage Kubernetes clusters on AWS.Set Up AWS CLI
Lastly, go ahead and install the AWS CLI tool. When you're installing it, you'll need to create an access key-value pair. This key part lets you set up the AWS CLI so you can use it to talk to your AWS account right from the command line. The AWS CLI is super handy for working with AWS services without clicking around in a browser, and you can even automate things by writing simple scripts.
Note:
To aid in the installation and configuration of these tools, At the end of this article, I will be sharing direct links to helpful YouTube tutorials through which you can download, install, and configure these tools in your system. The entire setup process can usually be completed within an hour, making you ready to embark on your deployment journey. However, please note that AWS account verification might extend up to a few days as AWS conducts a thorough verification of your credentials. Once your account is set up and verified, you're all set to proceed.
Steps to achieve this:
Once the installation and configuration part is done. Let's move to the main steps:
Context: I have a spring boot application named DeployingDockerImageToAws ready and the name of my project jar file is deployjobapp.jar.I will be using this project as a reference for deployment.
I am attaching the GitHub link to my project for more clarity:
Step1:
To create a JAR file of your Spring Boot project with a name of your choice, use the Maven build command with the goal set to "package" while skipping tests since we are not utilizing tests with this application.
Right-click on the project, select "Run as," then choose "Maven build." In the goal field, enter "package" and include an option to skip tests.

If you want to change the name of your JAR file, open the pom.xml file, navigate to the <build> section, and add <finalName> before or after the <plugins> section.

Step2:
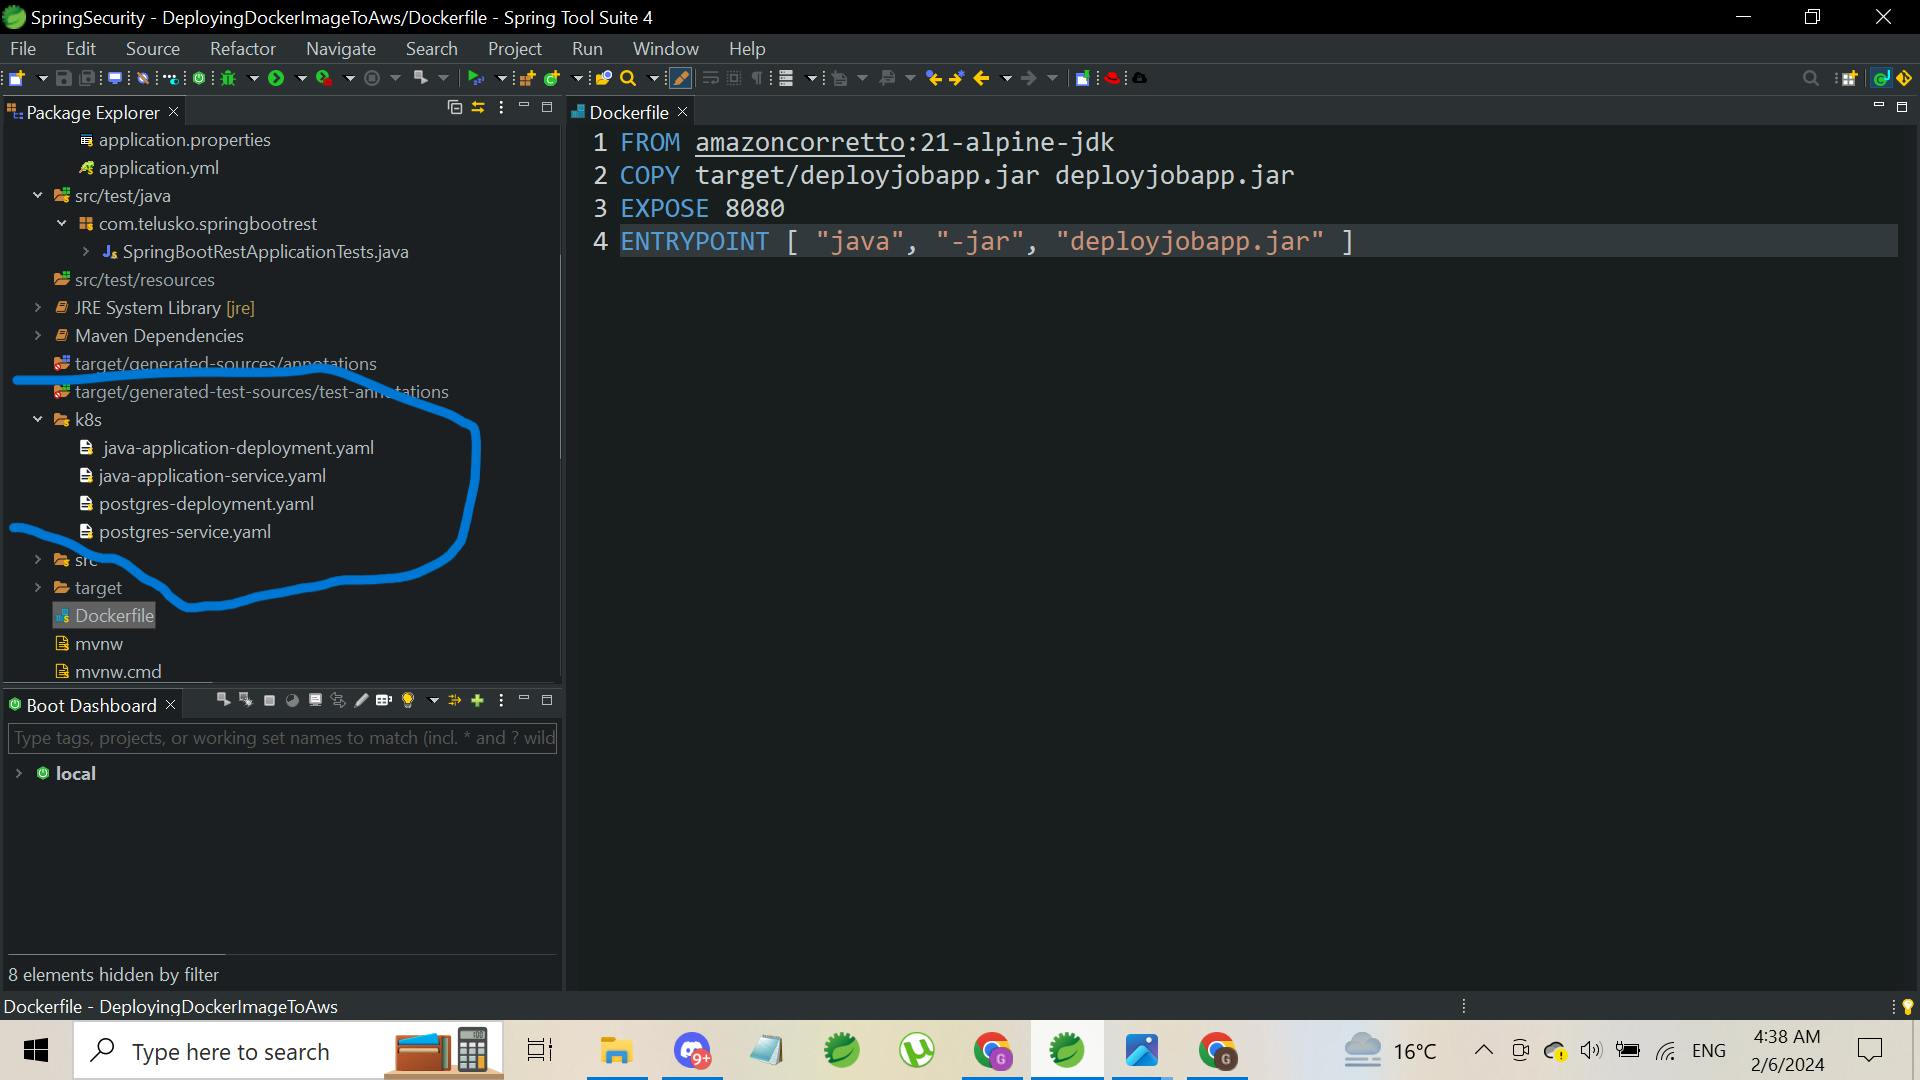
Once the jar file is created, we will now create a new file in our project with the exact name 'Dockerfile' without any extension and configure it like this. Make sure to change the JDK and jar file name for source and destination as per your project.
FROM amazoncorretto:21-alpine-jdk
COPY target/deployjobapp.jar deployjobapp.jar
EXPOSE 8080
ENTRYPOINT [ "java", "-jar", "deployjobapp.jar" ]
Explanation for the above code: This Dockerfile is designed to create a Docker image for a Java application using Amazon Corretto 21 on Alpine Linux for a lightweight and secure environment. It copies a Java JAR file named deployjobapp.jar from your project into the Docker image. The EXPOSE 8080 command tells Docker that the application inside the container will use port 8080. Finally, the ENTRYPOINT command specifies that the container will start by executing the Java application, running java -jar deployjobapp.jar, thus launching your Spring Boot application.
Step3:
Once the Jar file is created, open aws sign in from your browser, and search for ECR in the search box.
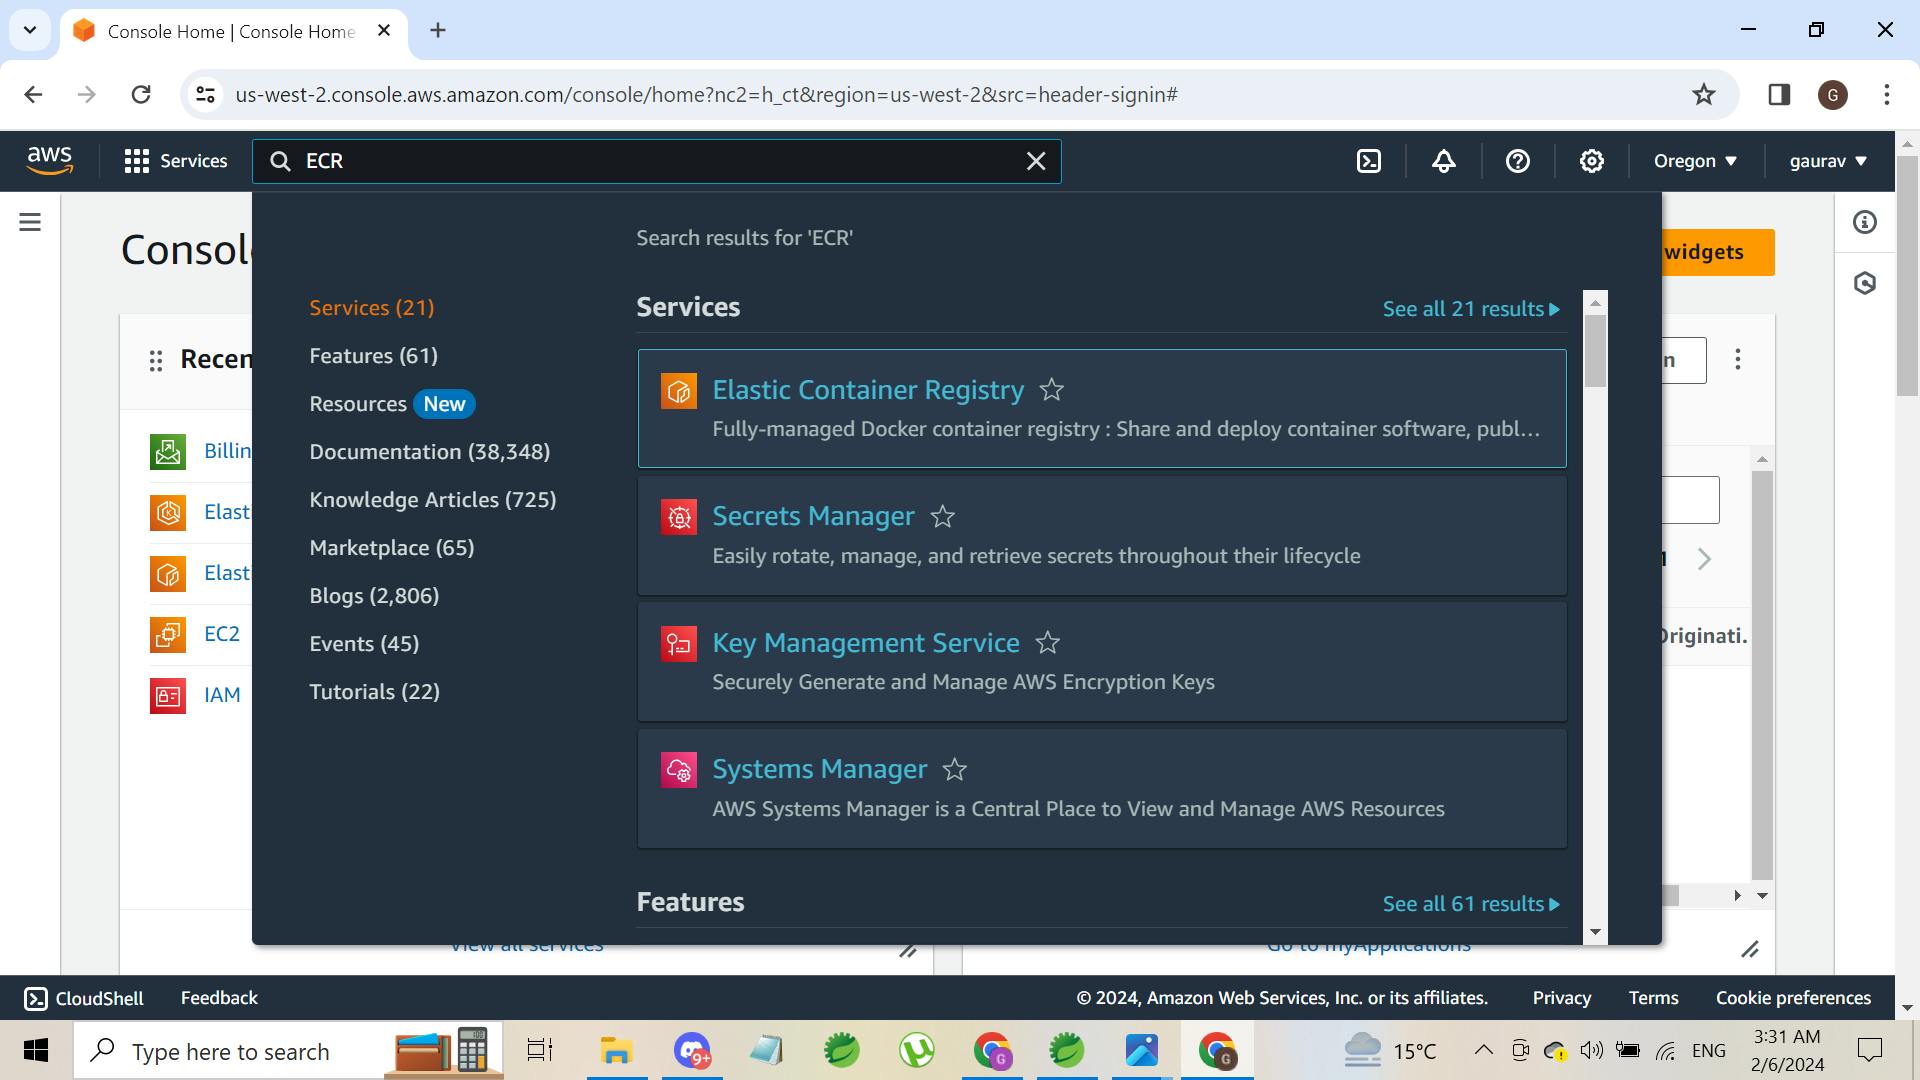
Open the ECR (Elastic Container Registry) and create a repository with the name of your choice. Click on Create a Repository.

now, keep everything default, just give your repository name as per your wish. Make sure to keep your repository private.

Now, once the repository is created. Refresh the page, a repository will be visible like this with whatever name you had given.

Now, open the repository by clicking on the name.
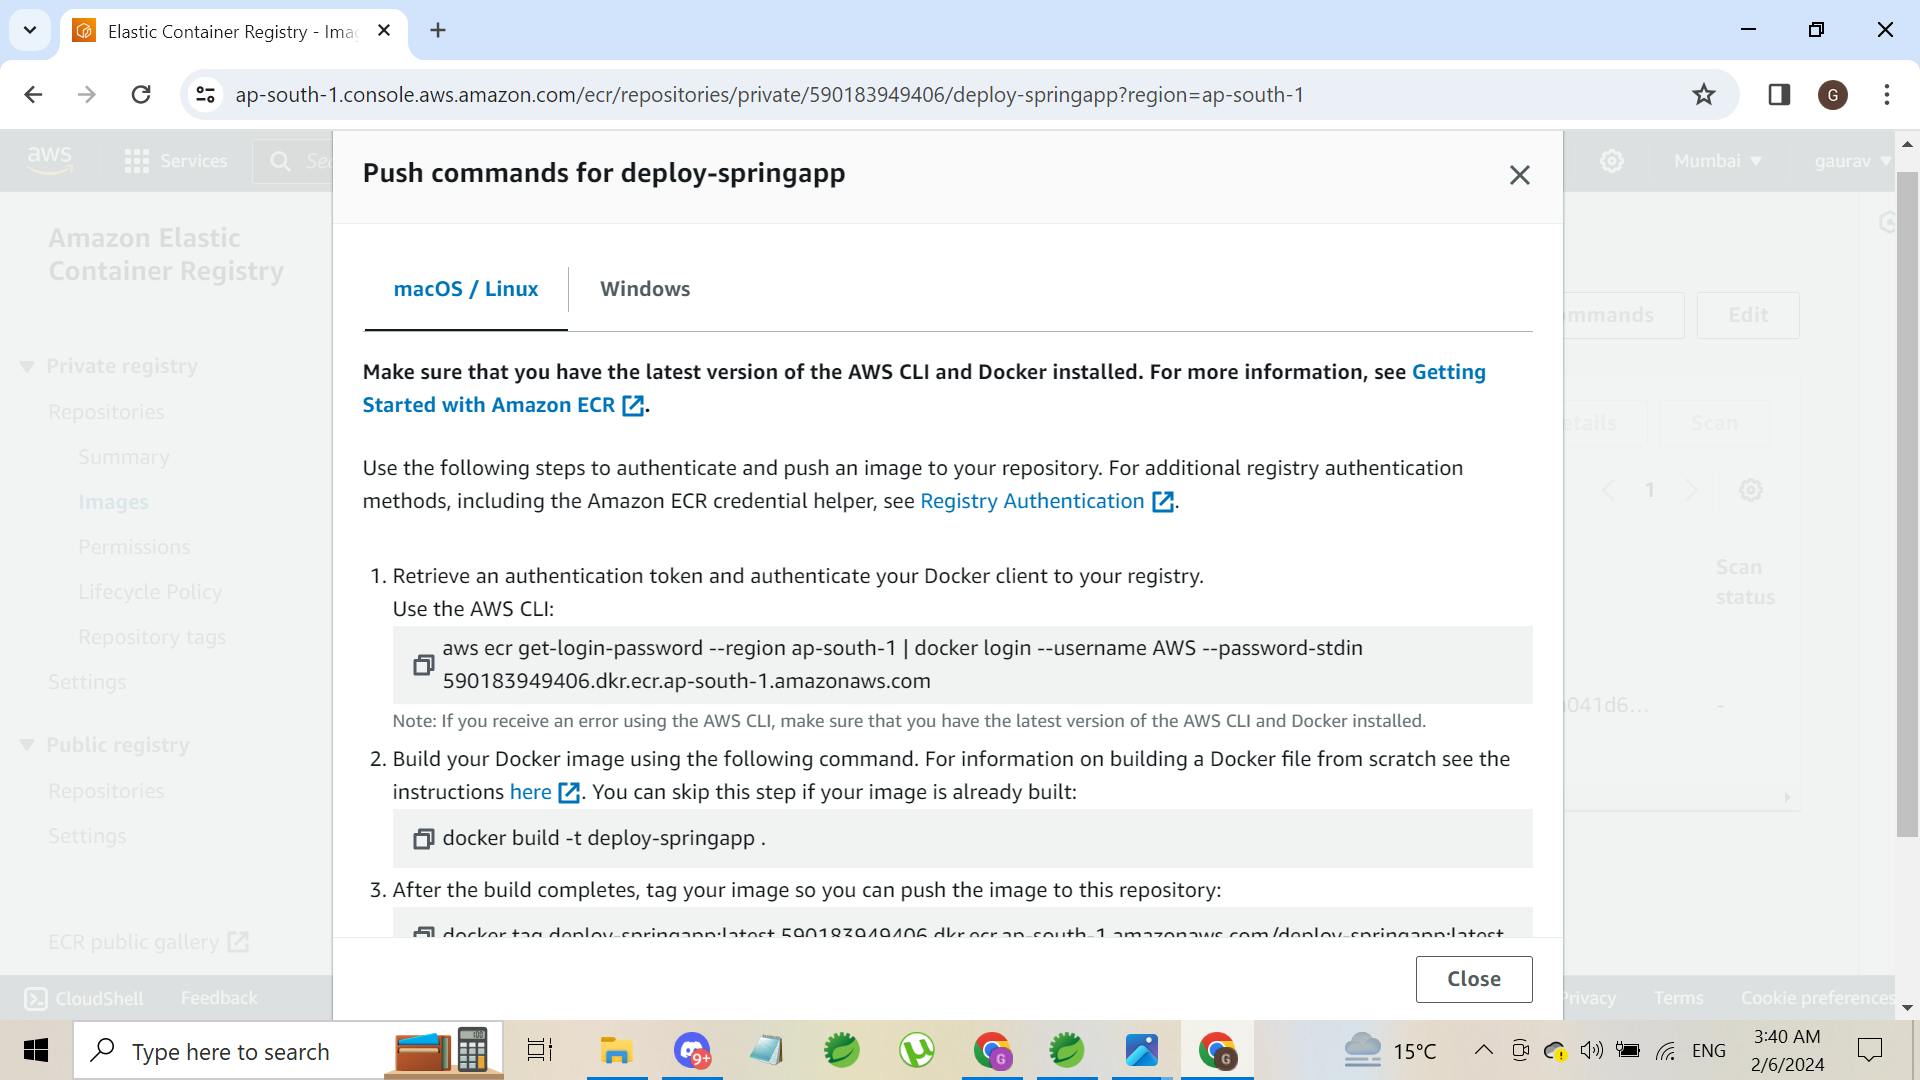
See on the upper right side of the page, a button named view push commands is visible. Click and open this view push commands. A page will appear with four sets of commands. You have to run these in your project folder directory. Open the cmd in your project folder directory and run the exact commands by copy-paste.
Once, you run all the commands successfully an image will be created in your repository.

Step4:
Now that we've got our Docker image ready in the ECR (Elastic Container Registry), the next step is to get this image running on a bunch of computers in the cloud. For that, we're going to use something called a Kubernetes cluster within AWS's EKS (Elastic Kubernetes Service). But first, we need to set up this cluster.
Think of a Kubernetes cluster as a team of computers working together. This team makes sure your app can handle lots of users, fix itself if something goes wrong, and easily grow when more people use your app. In this team, there's a boss computer (the master node) that tells the other computers (worker nodes) what to do, like running your app. Setting up a cluster in EKS means AWS takes care of the heavy lifting, making it simpler for you to manage your app as it gets popular.
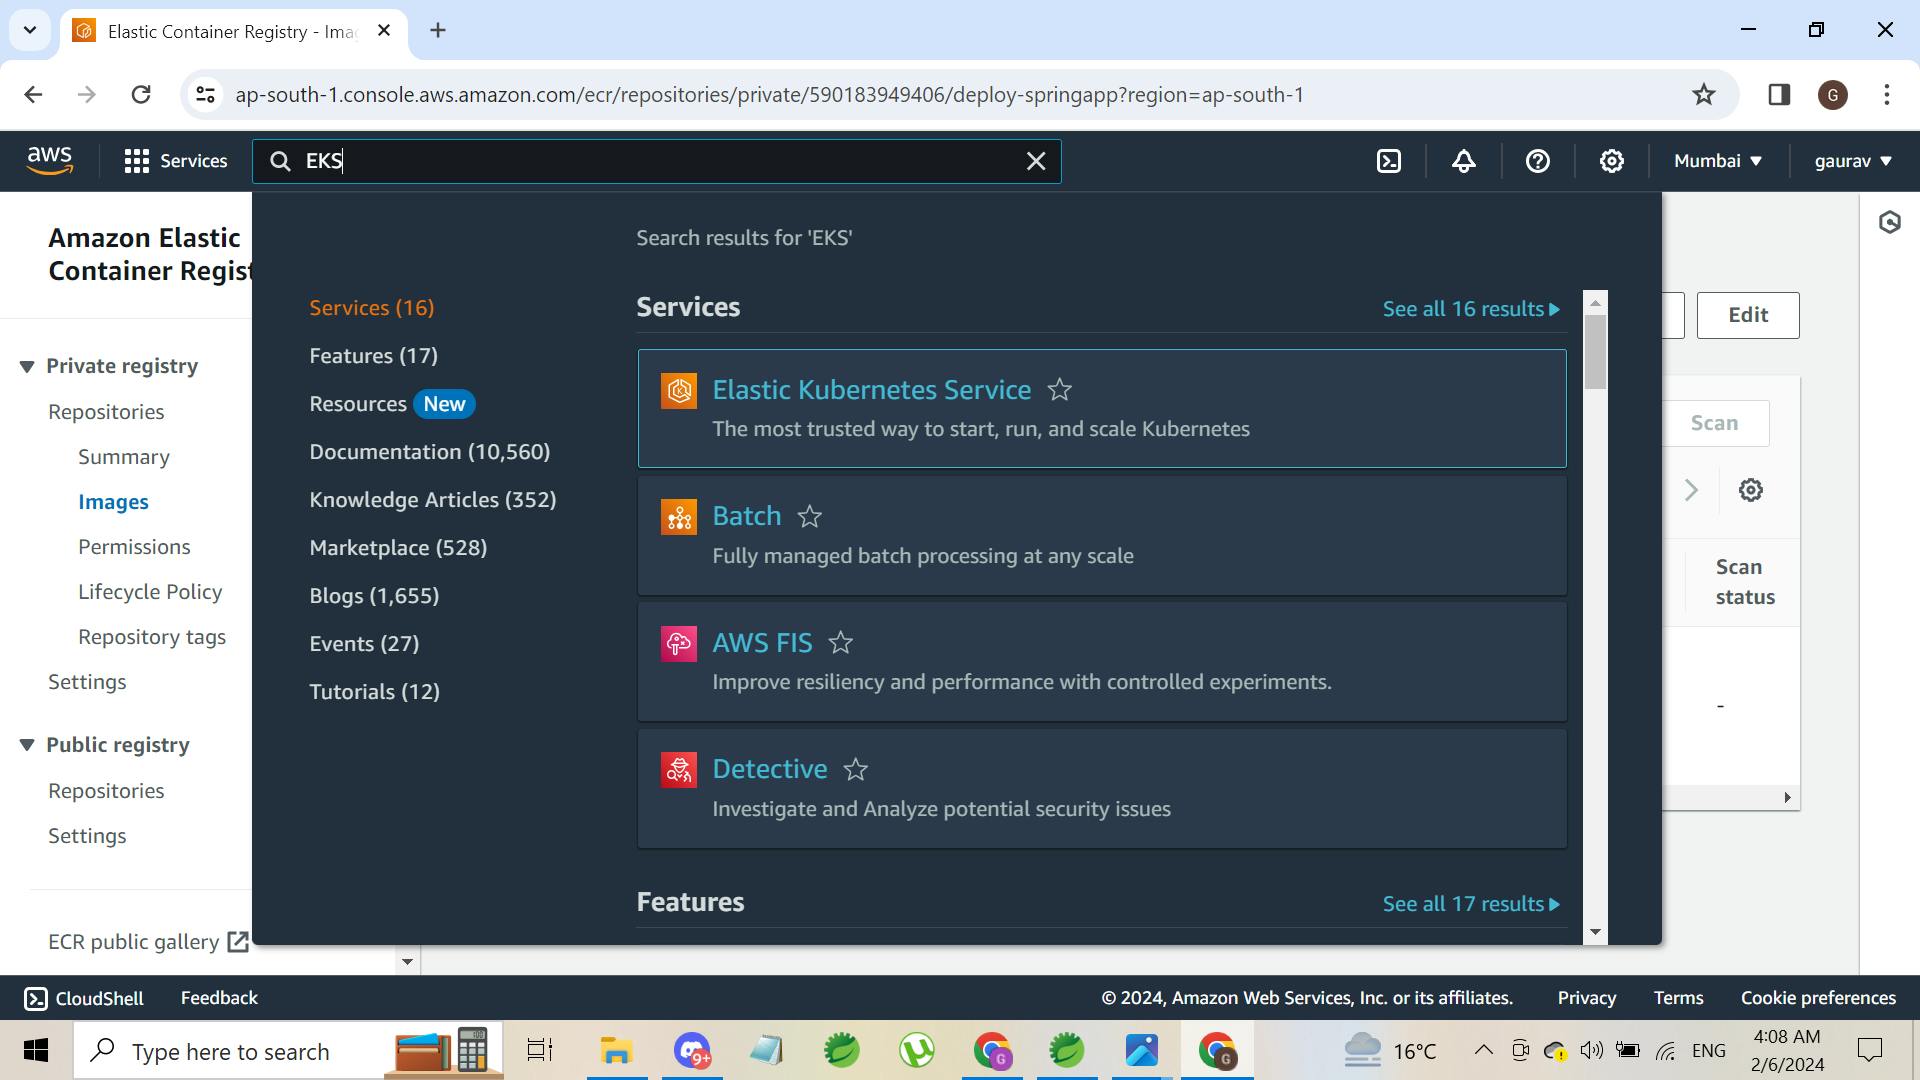
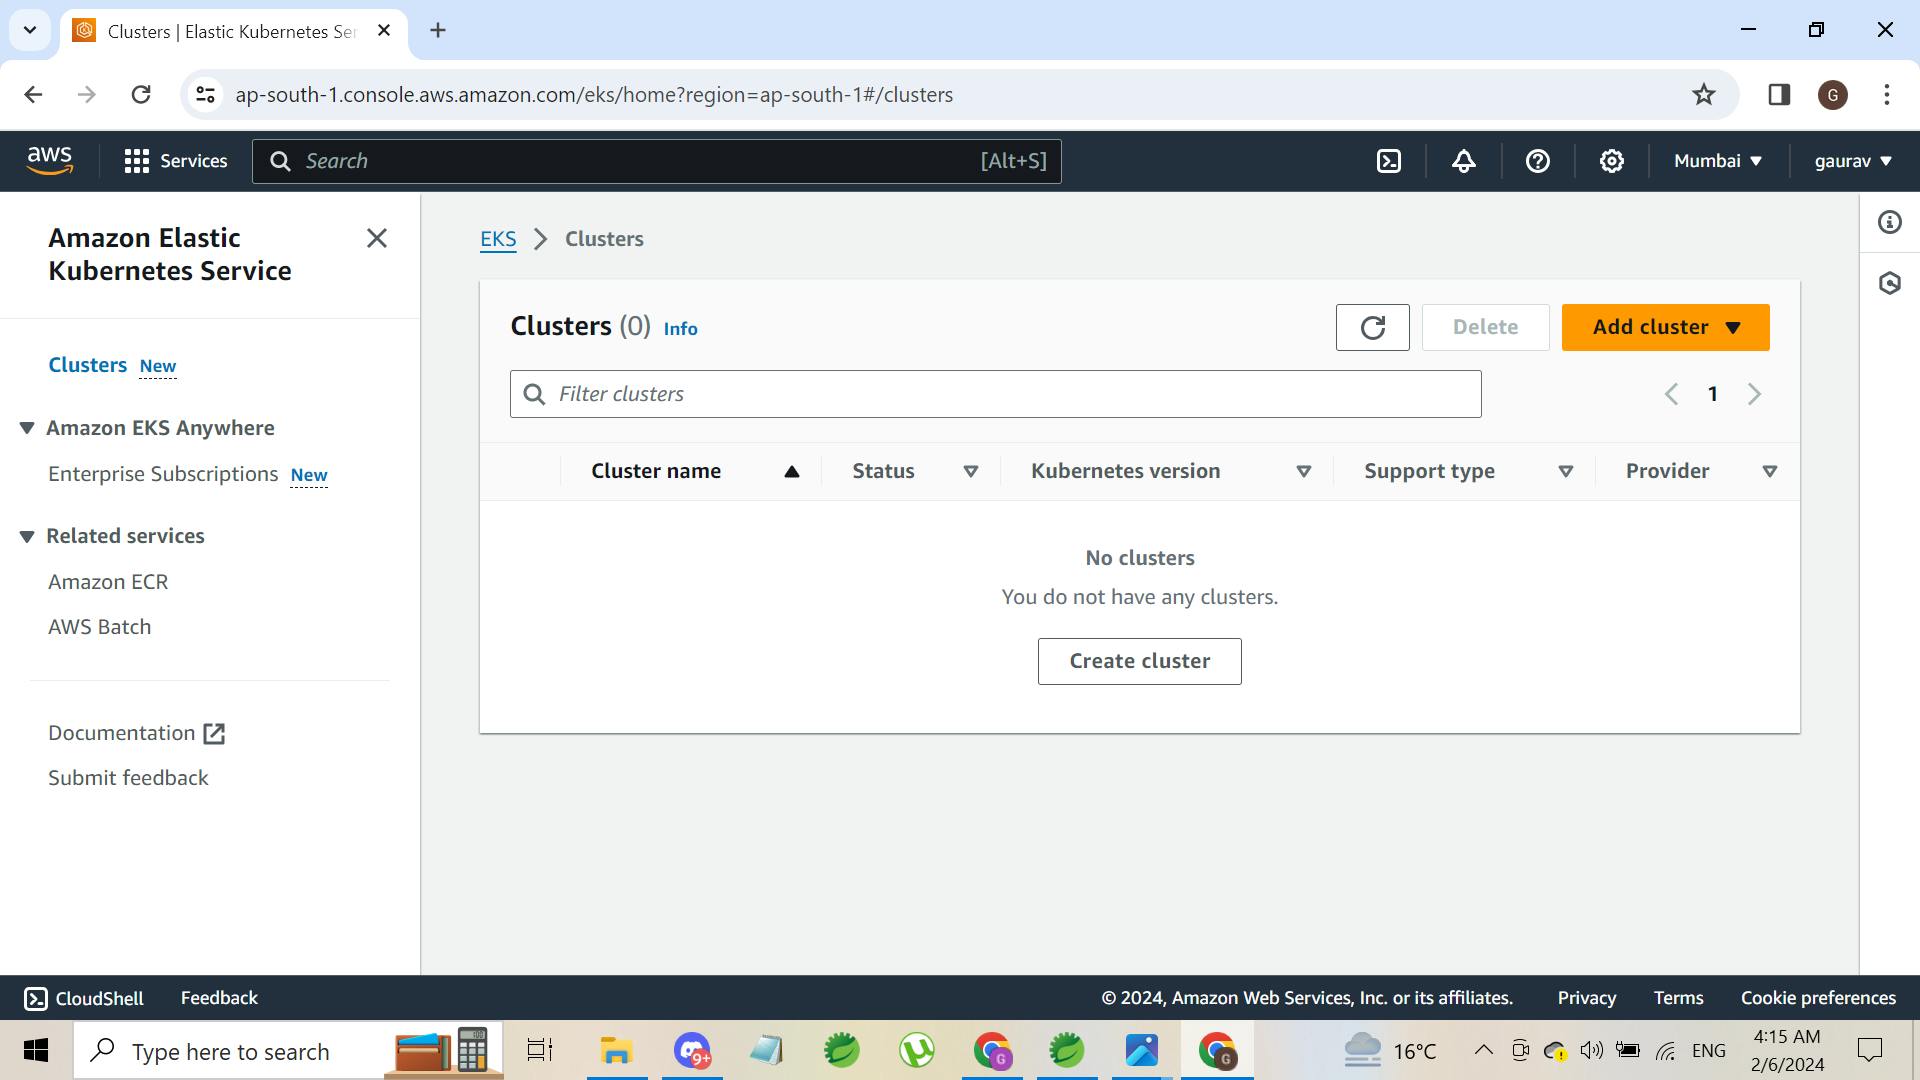
Search for EKS in aws search box. You will see this image.
Now, click on Elastic Kubernetes Service, u will find no cluster there as we haven't created it yet. Now our main task is to create a Kubernetes cluster and for this, we use a command line interface instead of AWS console for better control over resources.
Now, we will create a Kubernetes cluster with the help of a command line. Open the command line in your project directory and run the following command. Change the cluster name, no of nodes, size of nodes, and region according to project requirements.
eksctl create cluster --name telusko-cluster2 --version 1.28 --nodes=1 --node-type=t2.small --region us-west-2
Now, a cluster will be generated in the given region that you have passed through the command line. Please switch to that particular region in aws console to see the generated cluster.
Note: In AWS, creating a cluster can take up to 20 minutes. average time is 15 minutes.
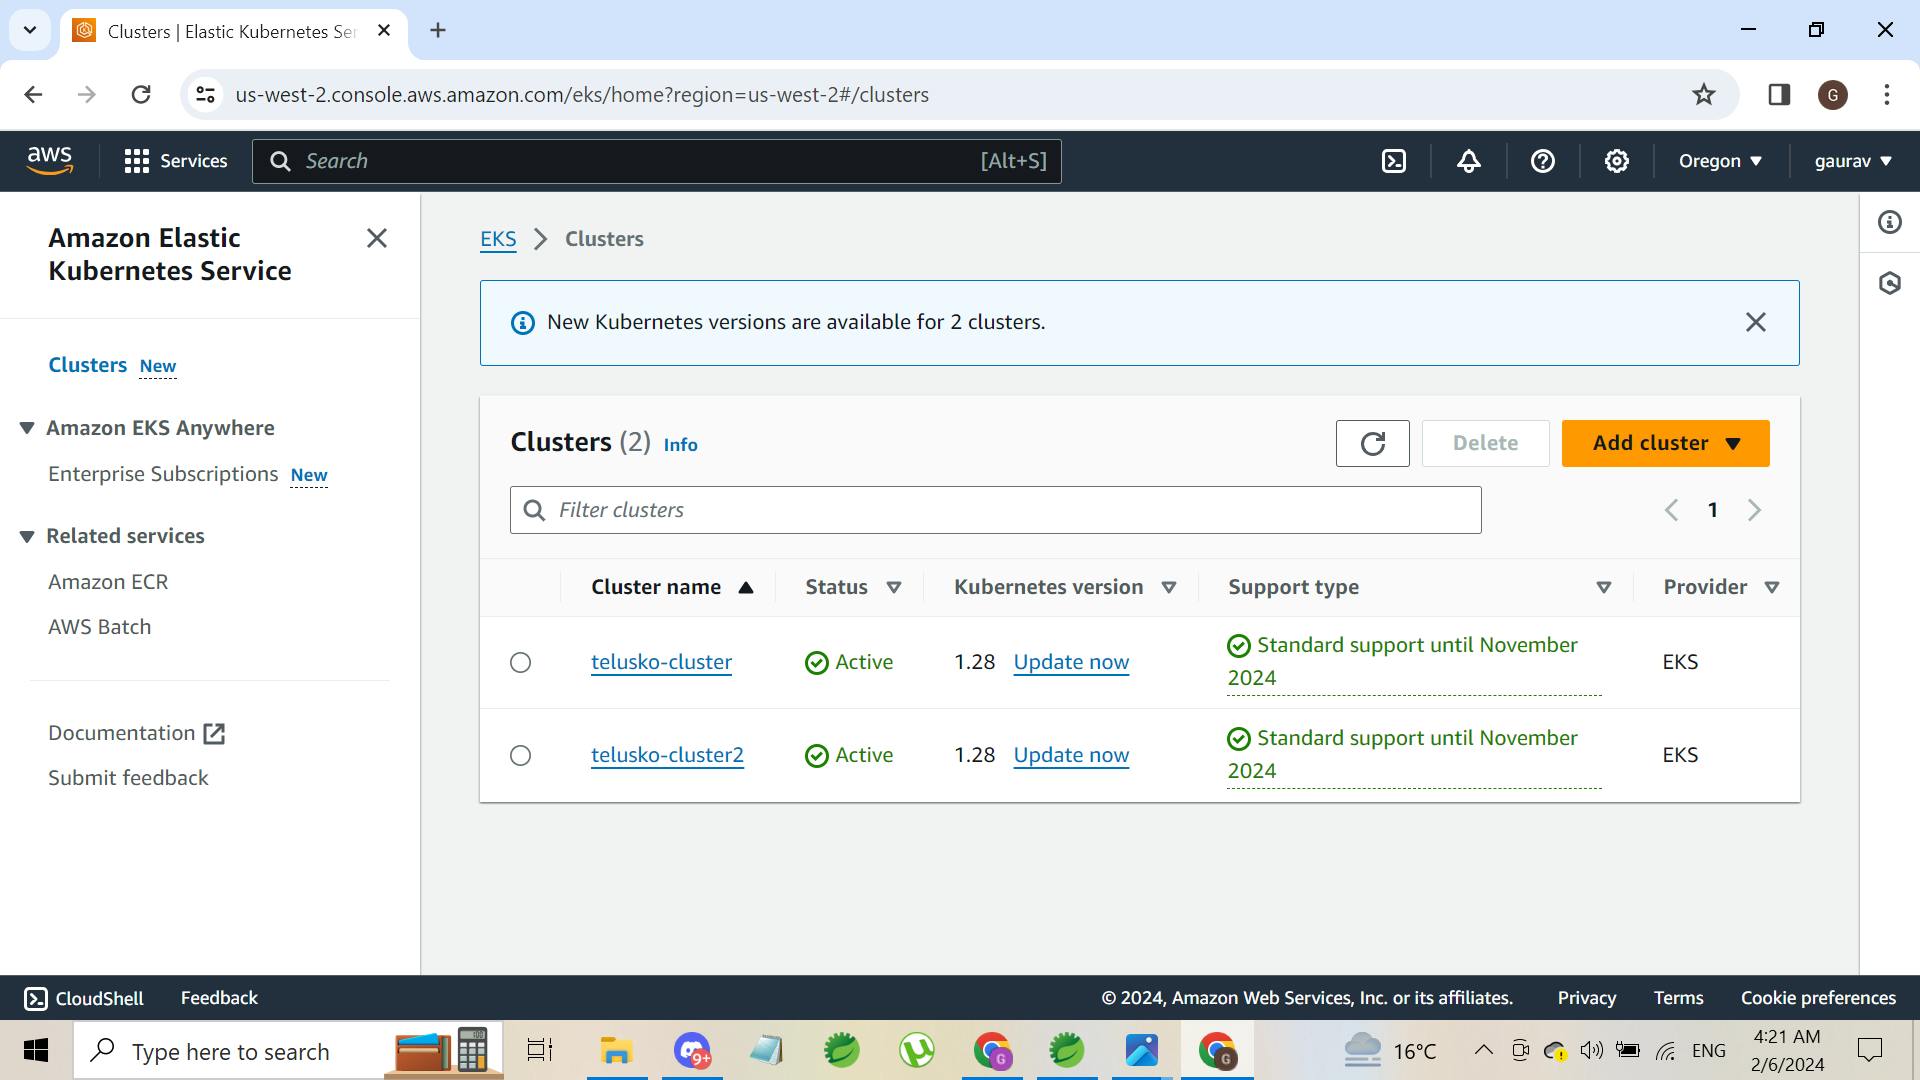
now, a cluster is generated named telusko-cluster2.
Step5:
update the local kubeconfig file with your cluster. The command is as follows:
aws eks --region us-west-2 update-kubeconfig --name telusko-cluster2
Updating the local kubeconfig file is like adding your new Kubernetes cluster's address to your phone's contact list. This step lets your computer's kubectl tool knows how to talk to your cluster on AWS, making it easy for you to send commands, check on your app, and make changes from your computer.
Step6:
Creating YAML files for Kubernetes configuration. In my project, I have created a folder named k8s for storing YAML files related to my spring boot application and database.
The configuration for yaml files for my project is as follows. make sure to change the port no, database details, and image according to your project requirements.
Note: please use the docker image URL which we have created and stored in step 3 in the below yaml file.
Brief Overview: Creating a YAML file for your Spring Boot application and its database for Kubernetes is like making a recipe that tells Kubernetes how to cook up your app and database on its servers. This "recipe" includes details like which ingredients (Docker images) to use, how many servings (instances of your app) you need based on how hungry (how much traffic) you expect, and how to set the table (which ports to open).
For your app, the YAML will say, "Here's the container (Docker image) I want you to run, and I need this many copies to keep everyone happy (ensure the app can handle the load)."
For the database, the YAML is like adding a side dish, specifying what type (like MySQL or MongoDB), how to store leftovers safely (persistent storage for data), and making sure only your app gets a taste (security settings).
In essence, these YAML files are your way of giving Kubernetes a detailed plan on how to deploy and manage your app and its database, making sure everything runs smoothly and efficiently in the cloud.
- java-application-deployment.yaml
apiVersion: apps/v1
kind: Deployment
metadata:
  name: java-application
spec:
  replicas: 2
  selector:
    matchLabels:
      app: java-application
  template:
    metadata:
      labels:
        app: java-application
    spec:
      containers:
      - name: java-application
        image: 590183949406.dkr.ecr.ap-south-1.amazonaws.com/deploy-springapp:latest
        ports:
        - containerPort: 8080
        env:
        - name: SPRING_DATASOURCE_URL
          value: jdbc:postgresql://postgres-db-service:5432/mydb
        - name: SPRING_DATASOURCE_USERNAME
          value: postgres
        - name: SPRING_DATASOURCE_PASSWORD
          value: "12345"
This YAML file describes a Kubernetes Deployment for a Java application. Here's a brief explanation of its components:
apiVersion: apps/v1: Specifies the API version used for the Deployment.
kind: Deployment: Indicates that this is a Deployment resource, which manages the deployment and scaling of a set of Pods (containers).
metadata: Contains metadata about the Deployment, including its name
java-application.spec: Defines the desired state of the Deployment.
replicas: 2: Requests two instances (replicas) of the application to be running.
selector: Specifies how the Deployment finds the Pods it manages, using
matchLabelsto select based on the labelapp: java-application.template: Describes the Pods to be launched, including their labels and container specifications.
containers: Lists the containers to run in the Pods.
image: Specifies the Docker image to use for the container,
590183949406.dkr.ecr.ap-south-1.amazonaws.com/deploy-springapp:latestwhich is stored in AWS Elastic Container Registry (ECR).ports: Lists the ports the container exposes, here it's
8080for web traffic.env: Defines environment variables for the container, including database connection details (
SPRING_DATASOURCE_URL,SPRING_DATASOURCE_USERNAME,SPRING_DATASOURCE_PASSWORD), connecting to a PostgreSQL database namedmydbon a service namedpostgres-db-serviceat port5432.
This setup ensures that the Java application can be deployed, managed, and scaled efficiently on Kubernetes, with two instances for availability and load distribution, and configured to connect to a PostgreSQL database using specified credentials.
java-application-service.yaml
 apiVersion: v1
 kind: Service
 metadata:
   name: java-application-service
 spec:
   type: LoadBalancer
   selector:
     app: java-application
   ports:
     - protocol: TCP
       port: 80
       targetPort: 8080
This YAML file defines a Kubernetes Service named
java-application-service. It's set up as aLoadBalancer, which means it distributes incoming network traffic across multiple deployed instances of your application (matching theapp: java-applicationlabel). The service listens on the port80(common HTTP port) and forwards traffic to a port8080on your application containers, enabling external access to your app over the internet.
postgres-deployment.yaml
 apiVersion: apps/v1
 kind: Deployment
 metadata:
   name: postgres-db
 spec:
   replicas: 2
   selector:
     matchLabels:
       app: postgres-db
   template:
     metadata:
       labels:
         app: postgres-db
     spec:
       containers:
       - name: postgres-db
         image: postgres:latest
         ports:
         - containerPort: 5432
         env:
         - name: POSTGRES_DB
           value: mydb
         - name: POSTGRES_USER
           value: postgres
         - name: POSTGRES_PASSWORD
           value: "12345"
         volumeMounts:
         - mountPath: /var/lib/postgresql/data
           name: postgres-data
       volumes:
       - name: postgres-data
         emptyDir: {}
This YAML file sets up a Kubernetes Deployment for a PostgreSQL database. It specifies 2 replicas for high availability, using the
postgres:latestimage. The Deployment is configured to expose PostgreSQL's default port, 5432, and sets environment variables for the database name, user, and password. It also includes avolumeMountssection to store database data/var/lib/postgresql/datausing anemptyDirvolume, which means data will be stored on the container's filesystem and will be lost if the container is restarted or deleted. This setup is typically used for development or testing environments.postgres-service.yaml
 apiVersion: v1
 kind: Service
 metadata:
   name: postgres-db-service
 spec:
   selector:
     app: postgres-db
   ports:
     - protocol: TCP
       port: 5432
       targetPort: 5432
This YAML file defines a Kubernetes Service named postgres-db-service. It selects pods with the label app: postgres-db to direct traffic to. The service exposes PostgreSQL's default port, 5432both as the port that the service listens on and the target port on the pods, facilitating communication to the PostgreSQL database pods within the Kubernetes cluster. This setup allows other components in the cluster to connect to the database using the service's stable endpoint.
Step7:
Now, that our Kubernetes configuration is set, let's have a look at our application.yml file. Change the hibernate properties according to the project requirements.
spring:
  datasource:
    url: ${SPRING_DATASOURCE_URL}
    username: ${SPRING_DATASOURCE_USERNAME}
    password: ${SPRING_DATASOURCE_PASSWORD}
  jpa:
    properties:
      hibernate:
        dialect: org.hibernate.dialect.PostgreSQLDialect
    hibernate:
      ddl-auto: update
    show-sql: true

server:
  port: 8080
Step8:
Now, that every configuration is set up, let's deploy our docker container. Open the cmd in the project folder directory and then run the command given below:
kubectl apply -f k8s/
Explanation: The command kubectl apply -f k8s/ tells Kubernetes to set up or update your app using the instructions in the k8s/ directory. It looks at all the YAML files in that folder, which describe how your app and its parts should run. This command can create new things or change existing ones to match what the files say, helping you manage your app in the cloud easily.
Congratulations. You just deployed your spring boot application to the AWS cloud using ECR and EKS.
Step9:
Here are some common commands which will be helpful.
to get a list of deployments
kubectl get deploymentsto get a list of services
kubectl get servicesto find all the pods.
kubectl get podsto check logs of specific pods
kubectl logs <pod-name>
to get the external IP address of your application:
kubectl get services
Note: For Reference
I have attached a full cmd commands log and video recording of the whole process which I have done during this whole process. It will be helpful if u get stuck anywhere.
Microsoft Windows [Version 10.0.22621.3085]
(c) Microsoft Corporation. All rights reserved.

C:\Users\gshar\Documents\workspace-spring-tool-suite-4-4.21.0.RELEASE\DeployingDockerImageToAws>aws ecr get-login-password --region ap-south-1 | docker login --username AWS --password-stdin 590183949406.dkr.ecr.ap-south-1.amazonaws.com
Login Succeeded

C:\Users\gshar\Documents\workspace-spring-tool-suite-4-4.21.0.RELEASE\DeployingDockerImageToAws>docker build -t deploy-springapp .
2024/02/05 04:44:46 http2: server: error reading preface from client //./pipe/docker_engine: file has already been closed
[+] Building 3.5s (8/8) FINISHED                                                                         docker:default
 => [internal] load build definition from Dockerfile                                                               0.0s
 => => transferring dockerfile: 183B                                                                               0.0s
 => [internal] load .dockerignore                                                                                  0.0s
 => => transferring context: 2B                                                                                    0.0s
 => [internal] load metadata for docker.io/library/amazoncorretto:21-alpine-jdk                                    2.2s
 => [auth] library/amazoncorretto:pull token for registry-1.docker.io                                              0.0s
 => [internal] load build context                                                                                  0.9s
 => => transferring context: 48.68MB                                                                               0.9s
 => CACHED [1/2] FROM docker.io/library/amazoncorretto:21-alpine-jdk@sha256:ecdb53d62a45cb978b849e30ebcc16933ad5c  0.0s
 => [2/2] COPY target/deployjobapp.jar deployjobapp.jar                                                            0.1s
 => exporting to image                                                                                             0.2s
 => => exporting layers                                                                                            0.1s
 => => writing image sha256:655a9f9a2bd8d36a588dc4f1d82c5843dc4ae8d1f9768b635853410ef8ee163b                       0.0s
 => => naming to docker.io/library/deploy-springapp                                                                0.0s

View build details: docker-desktop://dashboard/build/default/default/ibw9cnl4l91jabdc806h36068

What's Next?
  View a summary of image vulnerabilities and recommendations → docker scout quickview

C:\Users\gshar\Documents\workspace-spring-tool-suite-4-4.21.0.RELEASE\DeployingDockerImageToAws>docker tag deploy-springapp:latest 590183949406.dkr.ecr.ap-south-1.amazonaws.com/deploy-springapp:latest

C:\Users\gshar\Documents\workspace-spring-tool-suite-4-4.21.0.RELEASE\DeployingDockerImageToAws>docker push 590183949406.dkr.ecr.ap-south-1.amazonaws.com/deploy-springapp:latest
The push refers to repository [590183949406.dkr.ecr.ap-south-1.amazonaws.com/deploy-springapp]
ba4c9266340f: Pushed
f37c660d8a06: Pushed
d4fc045c9e3a: Pushed
latest: digest: sha256:5a041d682553c6320b0db2e69e460d8e0717fccf459844af60aeff69235c8140 size: 953

C:\Users\gshar\Documents\workspace-spring-tool-suite-4-4.21.0.RELEASE\DeployingDockerImageToAws>eks create cluster --name telusko-cluster2 --version 1.28 --nodes=1 --node-type=t2.small --region us-west-2
'eks' is not recognized as an internal or external command,
operable program or batch file.

C:\Users\gshar\Documents\workspace-spring-tool-suite-4-4.21.0.RELEASE\DeployingDockerImageToAws>eksctl create cluster --name telusko-cluster2 --version 1.28 --nodes=1 --node-type=t2.small --region us-west-2
2024-02-05 04:48:01 [ℹ]  eksctl version 0.170.0
2024-02-05 04:48:01 [ℹ]  using region us-west-2
2024-02-05 04:48:03 [ℹ]  skipping us-west-2d from selection because it doesn't support the following instance type(s): t2.small
2024-02-05 04:48:03 [ℹ]  setting availability zones to [us-west-2b us-west-2c us-west-2a]
2024-02-05 04:48:03 [ℹ]  subnets for us-west-2b - public:192.168.0.0/19 private:192.168.96.0/19
2024-02-05 04:48:03 [ℹ]  subnets for us-west-2c - public:192.168.32.0/19 private:192.168.128.0/19
2024-02-05 04:48:03 [ℹ]  subnets for us-west-2a - public:192.168.64.0/19 private:192.168.160.0/19
2024-02-05 04:48:03 [ℹ]  nodegroup "ng-261020b4" will use "" [AmazonLinux2/1.28]
2024-02-05 04:48:03 [ℹ]  using Kubernetes version 1.28
2024-02-05 04:48:03 [ℹ]  creating EKS cluster "telusko-cluster2" in "us-west-2" region with managed nodes
2024-02-05 04:48:03 [ℹ]  will create 2 separate CloudFormation stacks for cluster itself and the initial managed nodegroup
2024-02-05 04:48:03 [ℹ]  if you encounter any issues, check CloudFormation console or try 'eksctl utils describe-stacks --region=us-west-2 --cluster=telusko-cluster2'
2024-02-05 04:48:03 [ℹ]  Kubernetes API endpoint access will use default of {publicAccess=true, privateAccess=false} for cluster "telusko-cluster2" in "us-west-2"
2024-02-05 04:48:03 [ℹ]  CloudWatch logging will not be enabled for cluster "telusko-cluster2" in "us-west-2"
2024-02-05 04:48:03 [ℹ]  you can enable it with 'eksctl utils update-cluster-logging --enable-types={SPECIFY-YOUR-LOG-TYPES-HERE (e.g. all)} --region=us-west-2 --cluster=telusko-cluster2'
2024-02-05 04:48:03 [ℹ]
2 sequential tasks: { create cluster control plane "telusko-cluster2",
    2 sequential sub-tasks: {
        wait for control plane to become ready,
        create managed nodegroup "ng-261020b4",
    }
}
2024-02-05 04:48:03 [ℹ]  building cluster stack "eksctl-telusko-cluster2-cluster"
2024-02-05 04:48:05 [ℹ]  deploying stack "eksctl-telusko-cluster2-cluster"
2024-02-05 04:48:35 [ℹ]  waiting for CloudFormation stack "eksctl-telusko-cluster2-cluster"
2024-02-05 04:49:06 [ℹ]  waiting for CloudFormation stack "eksctl-telusko-cluster2-cluster"
2024-02-05 04:50:08 [ℹ]  waiting for CloudFormation stack "eksctl-telusko-cluster2-cluster"
2024-02-05 04:51:09 [ℹ]  waiting for CloudFormation stack "eksctl-telusko-cluster2-cluster"
2024-02-05 04:52:11 [ℹ]  waiting for CloudFormation stack "eksctl-telusko-cluster2-cluster"
2024-02-05 04:53:13 [ℹ]  waiting for CloudFormation stack "eksctl-telusko-cluster2-cluster"
2024-02-05 04:54:14 [ℹ]  waiting for CloudFormation stack "eksctl-telusko-cluster2-cluster"
2024-02-05 04:55:15 [ℹ]  waiting for CloudFormation stack "eksctl-telusko-cluster2-cluster"
2024-02-05 04:56:17 [ℹ]  waiting for CloudFormation stack "eksctl-telusko-cluster2-cluster"
2024-02-05 04:57:20 [ℹ]  waiting for CloudFormation stack "eksctl-telusko-cluster2-cluster"
2024-02-05 04:59:33 [ℹ]  building managed nodegroup stack "eksctl-telusko-cluster2-nodegroup-ng-261020b4"
2024-02-05 04:59:34 [ℹ]  deploying stack "eksctl-telusko-cluster2-nodegroup-ng-261020b4"
2024-02-05 04:59:34 [ℹ]  waiting for CloudFormation stack "eksctl-telusko-cluster2-nodegroup-ng-261020b4"
2024-02-05 05:00:06 [ℹ]  waiting for CloudFormation stack "eksctl-telusko-cluster2-nodegroup-ng-261020b4"
2024-02-05 05:00:58 [ℹ]  waiting for CloudFormation stack "eksctl-telusko-cluster2-nodegroup-ng-261020b4"
2024-02-05 05:02:29 [ℹ]  waiting for CloudFormation stack "eksctl-telusko-cluster2-nodegroup-ng-261020b4"
2024-02-05 05:02:29 [ℹ]  waiting for the control plane to become ready
2024-02-05 05:02:29 [✔]  saved kubeconfig as "C:\\Users\\gshar\\.kube\\config"
2024-02-05 05:02:29 [ℹ]  no tasks
2024-02-05 05:02:29 [✔]  all EKS cluster resources for "telusko-cluster2" have been created
2024-02-05 05:02:31 [ℹ]  nodegroup "ng-261020b4" has 1 node(s)
2024-02-05 05:02:31 [ℹ]  node "ip-192-168-86-101.us-west-2.compute.internal" is ready
2024-02-05 05:02:31 [ℹ]  waiting for at least 1 node(s) to become ready in "ng-261020b4"
2024-02-05 05:02:32 [ℹ]  nodegroup "ng-261020b4" has 1 node(s)
2024-02-05 05:02:32 [ℹ]  node "ip-192-168-86-101.us-west-2.compute.internal" is ready
2024-02-05 05:02:33 [ℹ]  kubectl command should work with "C:\\Users\\gshar\\.kube\\config", try 'kubectl get nodes'
2024-02-05 05:02:33 [✔]  EKS cluster "telusko-cluster2" in "us-west-2" region is ready

C:\Users\gshar\Documents\workspace-spring-tool-suite-4-4.21.0.RELEASE\DeployingDockerImageToAws>aws eks --region us-west-2 update-kubeconfig --name telusko-cluster2
Added new context arn:aws:eks:us-west-2:590183949406:cluster/telusko-cluster2 to C:\Users\gshar\.kube\config

C:\Users\gshar\Documents\workspace-spring-tool-suite-4-4.21.0.RELEASE\DeployingDockerImageToAws>dir
 Volume in drive C has no label.
 Volume Serial Number is B84D-EC12

 Directory of C:\Users\gshar\Documents\workspace-spring-tool-suite-4-4.21.0.RELEASE\DeployingDockerImageToAws

02/05/2024  04:41 AM    <DIR>          .
02/05/2024  04:41 AM    <DIR>          ..
02/03/2024  04:40 AM             2,430 .classpath
02/03/2024  04:40 AM            11,529 .factorypath
01/31/2024  06:02 AM               395 .gitignore
02/05/2024  04:41 AM    <DIR>          .mvn
02/05/2024  04:41 AM             1,557 .project
02/05/2024  04:41 AM    <DIR>          .settings
02/05/2024  04:43 AM               144 Dockerfile
01/31/2024  06:02 AM             1,069 HELP.md
02/05/2024  04:41 AM    <DIR>          k8s
01/31/2024  06:02 AM            11,290 mvnw
01/31/2024  06:02 AM             7,592 mvnw.cmd
02/05/2024  04:42 AM             2,023 pom.xml
02/05/2024  04:41 AM    <DIR>          src
02/05/2024  04:42 AM    <DIR>          target
               9 File(s)         38,029 bytes
               7 Dir(s)  545,624,248,320 bytes free

C:\Users\gshar\Documents\workspace-spring-tool-suite-4-4.21.0.RELEASE\DeployingDockerImageToAws>kubectl apply -f k8s/
deployment.apps/java-application created
service/java-application-service created
deployment.apps/postgres-db created
service/postgres-db-service created

C:\Users\gshar\Documents\workspace-spring-tool-suite-4-4.21.0.RELEASE\DeployingDockerImageToAws>kubectl get deployments
NAME               READY   UP-TO-DATE   AVAILABLE   AGE
java-application   0/2     2            0           20s
postgres-db        2/2     2            2           19s

C:\Users\gshar\Documents\workspace-spring-tool-suite-4-4.21.0.RELEASE\DeployingDockerImageToAws>kubectl get pods
NAME                                READY   STATUS    RESTARTS   AGE
java-application-66774bd8fb-tx4wx   1/1     Running   0          52s
java-application-66774bd8fb-v2hmr   1/1     Running   0          52s
postgres-db-6dcf6d7946-5st67        1/1     Running   0          51s
postgres-db-6dcf6d7946-sqbqr        1/1     Running   0          51s

C:\Users\gshar\Documents\workspace-spring-tool-suite-4-4.21.0.RELEASE\DeployingDockerImageToAws>kubectl get services
NAME                       TYPE           CLUSTER-IP       EXTERNAL-IP                                                               PORT(S)        AGE
java-application-service   LoadBalancer   10.100.139.173   adb130fb8ea9c4119ae882d32724ce63-1982061030.us-west-2.elb.amazonaws.com   80:30299/TCP   68s
kubernetes                 ClusterIP      10.100.0.1       <none>                                                                    443/TCP        14m
postgres-db-service        ClusterIP      10.100.198.24    <none>                                                                    5432/TCP       67s

C:\Users\gshar\Documents\workspace-spring-tool-suite-4-4.21.0.RELEASE\DeployingDockerImageToAws>kubectl logs java-application-66774bd8fb-tx4wx

  .   ____          _            __ _ _
 /\\ / ___'_ __ _ _(_)_ __  __ _ \ \ \ \
( ( )\___ | '_ | '_| | '_ \/ _` | \ \ \ \
 \\/  ___)| |_)| | | | | || (_| |  ) ) ) )
  '  |____| .__|_| |_|_| |_\__, | / / / /
 =========|_|==============|___/=/_/_/_/
 :: Spring Boot ::                (v3.2.2)

2024-02-04T23:37:29.663Z  INFO 1 --- [           main] c.t.s.SpringBootRestApplication          : Starting SpringBootRestApplication v0.0.1-SNAPSHOT using Java 21.0.2 with PID 1 (/deployjobapp.jar started by root in /)
2024-02-04T23:37:29.678Z  INFO 1 --- [           main] c.t.s.SpringBootRestApplication          : No active profile set, falling back to 1 default profile: "default"
2024-02-04T23:37:34.507Z  INFO 1 --- [           main] .s.d.r.c.RepositoryConfigurationDelegate : Bootstrapping Spring Data JPA repositories in DEFAULT mode.
2024-02-04T23:37:34.893Z  INFO 1 --- [           main] .s.d.r.c.RepositoryConfigurationDelegate : Finished Spring Data repository scanning in 329 ms. Found 2 JPA repository interfaces.
2024-02-04T23:37:38.457Z  INFO 1 --- [           main] o.s.b.w.embedded.tomcat.TomcatWebServer  : Tomcat initialized with port 8080 (http)
2024-02-04T23:37:38.530Z  INFO 1 --- [           main] o.apache.catalina.core.StandardService   : Starting service [Tomcat]
2024-02-04T23:37:38.531Z  INFO 1 --- [           main] o.apache.catalina.core.StandardEngine    : Starting Servlet engine: [Apache Tomcat/10.1.18]
2024-02-04T23:37:39.150Z  INFO 1 --- [           main] o.a.c.c.C.[Tomcat].[localhost].[/]       : Initializing Spring embedded WebApplicationContext
2024-02-04T23:37:39.152Z  INFO 1 --- [           main] w.s.c.ServletWebServerApplicationContext : Root WebApplicationContext: initialization completed in 9214 ms
2024-02-04T23:37:40.992Z  INFO 1 --- [           main] o.hibernate.jpa.internal.util.LogHelper  : HHH000204: Processing PersistenceUnitInfo [name: default]
2024-02-04T23:37:41.332Z  INFO 1 --- [           main] org.hibernate.Version                    : HHH000412: Hibernate ORM core version 6.4.1.Final
2024-02-04T23:37:41.531Z  INFO 1 --- [           main] o.h.c.internal.RegionFactoryInitiator    : HHH000026: Second-level cache disabled
2024-02-04T23:37:42.958Z  INFO 1 --- [           main] o.s.o.j.p.SpringPersistenceUnitInfo      : No LoadTimeWeaver setup: ignoring JPA class transformer
2024-02-04T23:37:43.092Z  INFO 1 --- [           main] com.zaxxer.hikari.HikariDataSource       : HikariPool-1 - Starting...
2024-02-04T23:37:44.168Z  INFO 1 --- [           main] com.zaxxer.hikari.pool.HikariPool        : HikariPool-1 - Added connection org.postgresql.jdbc.PgConnection@698f4aa
2024-02-04T23:37:44.175Z  INFO 1 --- [           main] com.zaxxer.hikari.HikariDataSource       : HikariPool-1 - Start completed.
2024-02-04T23:37:44.341Z  WARN 1 --- [           main] org.hibernate.orm.deprecation            : HHH90000025: PostgreSQLDialect does not need to be specified explicitly using 'hibernate.dialect' (remove the property setting and it will be selected by default)
2024-02-04T23:37:49.816Z  INFO 1 --- [           main] o.h.e.t.j.p.i.JtaPlatformInitiator       : HHH000489: No JTA platform available (set 'hibernate.transaction.jta.platform' to enable JTA platform integration)
Hibernate: create table job_post (post_id integer not null, post_desc varchar(255), post_profile varchar(255), post_tech_stack varchar(255) array, req_experience integer, primary key (post_id))
Hibernate: create table users (id integer not null, password varchar(255), username varchar(255), primary key (id))
2024-02-04T23:37:50.038Z  INFO 1 --- [           main] j.LocalContainerEntityManagerFactoryBean : Initialized JPA EntityManagerFactory for persistence unit 'default'
2024-02-04T23:37:52.484Z  WARN 1 --- [           main] JpaBaseConfiguration$JpaWebConfiguration : spring.jpa.open-in-view is enabled by default. Therefore, database queries may be performed during view rendering. Explicitly configure spring.jpa.open-in-view to disable this warning
2024-02-04T23:37:54.305Z  INFO 1 --- [           main] o.s.s.web.DefaultSecurityFilterChain     : Will secure any request with [org.springframework.security.web.session.DisableEncodeUrlFilter@55ff64fd, org.springframework.security.web.context.request.async.WebAsyncManagerIntegrationFilter@20fdaf3e, org.springframework.security.web.context.SecurityContextHolderFilter@41e43885, org.springframework.security.web.header.HeaderWriterFilter@1ce45e18, org.springframework.web.filter.CorsFilter@445c693, org.springframework.security.web.authentication.logout.LogoutFilter@4a7c8cb7, org.springframework.security.web.authentication.www.BasicAuthenticationFilter@33d2f9d3, org.springframework.security.web.savedrequest.RequestCacheAwareFilter@193c3b1c, org.springframework.security.web.servletapi.SecurityContextHolderAwareRequestFilter@43d84df1, org.springframework.security.web.authentication.AnonymousAuthenticationFilter@9d2c0ed, org.springframework.security.web.session.SessionManagementFilter@6334c0d8, org.springframework.security.web.access.ExceptionTranslationFilter@5812935, org.springframework.security.web.access.intercept.AuthorizationFilter@5608e254]
2024-02-04T23:37:55.523Z  INFO 1 --- [           main] o.s.b.w.embedded.tomcat.TomcatWebServer  : Tomcat started on port 8080 (http) with context path ''
2024-02-04T23:37:55.550Z  INFO 1 --- [           main] c.t.s.SpringBootRestApplication          : Started SpringBootRestApplication in 28.799 seconds (process running for 31.827)

C:\Users\gshar\Documents\workspace-spring-tool-suite-4-4.21.0.RELEASE\DeployingDockerImageToAws>
Recorded Video link Step-by-step for more clarity: